Multiplayer Unity3D game with SmartFoxServer
Konstantinos Egkarchos / May 10, 2015
Seems that my previous post about how to Create a multiplayer flash game with SmartFoxServer made a hit. So, since I’m working with Unity3D this time I decided to make a tutorial about SmartFoxServer and Unity3D too. Before we start I want to point out that there are other networking solutions with unity too, with first and foremost Unity’s own solution which is updated in Unity 5.1 (Pro users with access to beta can already use it). However I feel more comfortable with SmartFox. Its API is full of features, easy to use and battle proven. Understanding however may need some hands on. Also, Java may be a bit spooky at the start for those who are coming from other languages but in the end the power of the Java programming language makes all the disadvantages that someone may attribute to this language, minor.
So, without further ado let’s dive. My software at the time of writing this article is Unity3D 5.0.1, Java 1.7, Eclipse, and SmartFoxServer’s own Community Edition v2.9, and Client API C# API for Unity 5(which is in beta atm) in a Windows 8.1 machine. I picked the x64 versions that were provided.
SmartFoxServer installation
Start by installing SmartFox. After the EULA, a message warns us that the installation folder needs Administrator privileges. To accommodate that I choose to make the installation at my user folder eg. C:\Users\konsnos\SmartFoxServer. Next I unchecked Install as service. If you are going for production I suggest you keep it ticked but for now we’re going for development use. Install as service will be a problem when we want to close and restart to apply the changes we do to the server, so I really don’t recommend it for development.
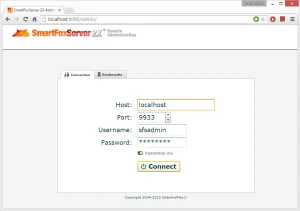
After the installation is complete SmartFox can be opened via the sfs2x-standalone.exe which is inside the folder SFS2X. Now open a new tab in your browser and point to http://localhost:8080/admin/ . If you can see a flash page asking you user name and password then the installation process went fine. Log in credentials for Host is localhost, port 9933, Username is sfsadmin and Password sfsadmin. And you’re in! I’m not going a deep explanation here of how SmartFox works but in order to know your way around, the basic usage comes from the Administration modules at the left.
For the beta version that I use a patch must be installed, to make this work for Unity5. As per SmartFox’s documentation this will be obsolete in SmartFoxServer 2X v2.10. But for our case extract the client API to a folder and copy the _patch folder, patcher.jar, install-win.bat and deploy.data.txt to our \SFS2X folder inside your installation location. Double click the patcher.jar and a window will pop up with the successful or failure message. Restart SmartFox standalone if it’s already open. Also re-login in the admin panel. The server version at the top should now be 2.9.3. We can now delete the files and folder we moved in our installation location (for the sake of clean up).
Unity3D project
Open Unity3D and create a project. I created a 3D project with the name Networking Example. When the new project is open, in the Project pane create a folder named Plugins and move the file \API\Debug\Unity\SmartFox2X.dll there. Again we are using a debug file. In production feel free to use the Release file. The difference is in the debug logs which the Release file doesn’t include.
Now that we have the API included we should start writing some SmartFox code. In our Assets folder we create a C# Script file ConnectionManager and another one named ConnectionInitializer. Copy paste the code for ConnectionManager and ConnectionInitializer. The ConnectionManager script handles SmartFox while the ConnectionInitializer is for testing it. I have tried to add descriptive comments but if you have any enquiry feel free to ask me.
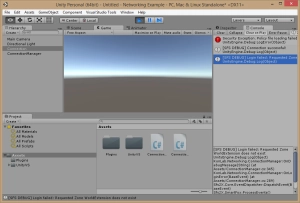
Now in Unity create a new GameObject and add the script ConnectionInitializer as a component. Make sure that sfs2x-standalone is running and you can log in in the Admin Panel. Then press Play in Unity. As you can see in my logs I had a successful connection. However the log in failed. The log says the requested zone doesn’t exist, which happens because we haven’t created it yet. As for the security exception we haven’t provided any policy file yet, and we won’t for this tutorial as it isn’t needed for testing.
SmartFoxServer Setup
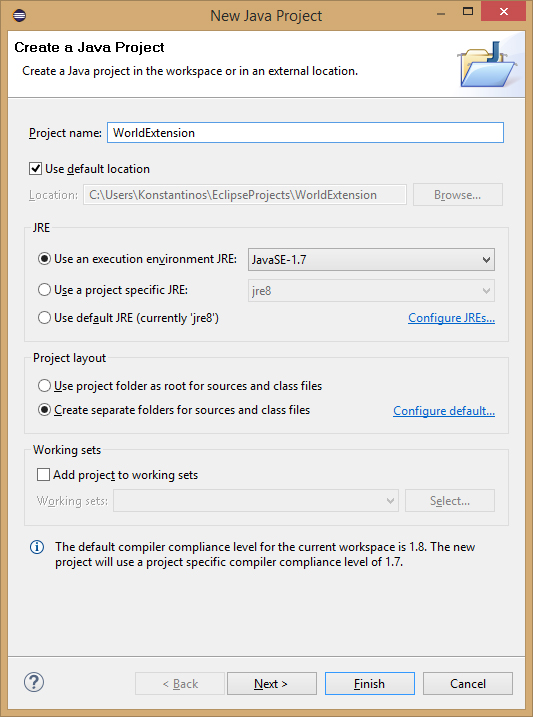
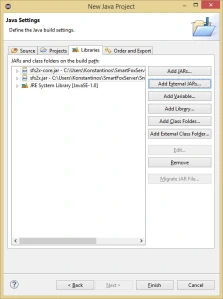
It’s time to get our hands dirty with the server. I’m using as I said earlier Eclipse so let’s create a new Java Project. Name it WorldExtension, and press Next. In the next window, Java Settings, we shall add SmartFoxServer libraries, so head into the tab Libraries, press Add External JARs, and locate the files sfs2x.jar and sfs2x-core.jar from the folder Installation_Directory\SmartFoxServer_2X\SFS2X\lib. Finally click Finish.
 Note: If you are new to Eclipse, or you just installed it, when you press Finish button nothing will happen. At least nothing visible. Try clicking the Restore icon at the left of the window and the project shall be revealed.
It’s time to write some code. In the src folder create a new class and name it WorldExtension. You may add from that window, as a Superclass the SFSExtension from com.smartfoxserver.v2.extensions or you can write it by yourself in code. Since we are at it, create another class with the name ForwardHandler, which will have as a Superclass the BaseClientRequestHandler, from the namespace com.smartfoxserver.v2.entities.User. Finally, the same as ForwardHandler, create HaltHandler.
Note: Always suffix your project name with the Extension text. SmartFoxServer needs it that way. It will make your life easier.
The Superclasses that you may have added (or may not) are the extends in Java, just like the inheritance of MonoBehaviour in Unity’s C# classes. Let’s fill them up from these three Gists WorldExtension, ForwardHandler, HaltHandler. Their code is quite simple. The WorldExtension class adds a listener for the command forward. When we send the forward command from the client, this part of code will instantly search for the ForwardHandler class and call the code in the function handleClientRequest. The ForwardHandler class will issue an updateSpeed command with an updated speed parameter. Same goes for HaltHandler which makes the speed parameter zero and returns it.
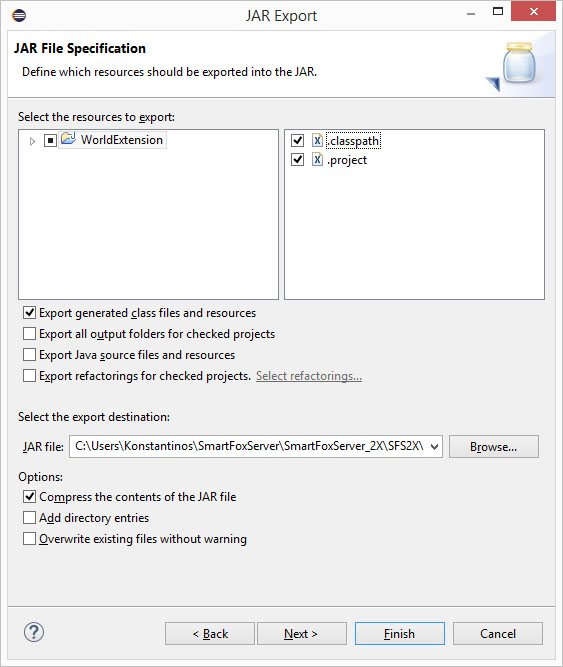
Our code is ready. Now we need to export it for use. Chose Export from the File menu, and from the export destination select the Java>JAR file and press Next. Tick the WorldExtension, and in the export destination select SMARTFOXSERVER_INSTALLATION_DIRECTORY\SmartFoxServer_2X\SFS2X\extensions\WorldExtension\WorldExtension.jar. I have added some folders which don’t exist here so create them respectively with the same naming convention.
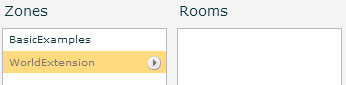
 It’s time for test again. If a SmartFox instance is running close it and open it again to scan our new extension. Log in again to the admin panel, and from the left head into Zone Configurator. In the left column that appeared click on the green plus button at the bottom, to create a new Zone for our server. In the Zone name, type in the name of the Extension we created in Java, WorldExtension. then head to the Zone Extension tab, and in the Name select the name of our extension. The Main class selection should fill itself automatically to indicate WorldExtension. If not then point to it. Finally click submit. We should see our new extension in the Zones column. Select it and press the button which indicates the start.
Send Commands from Unity3D
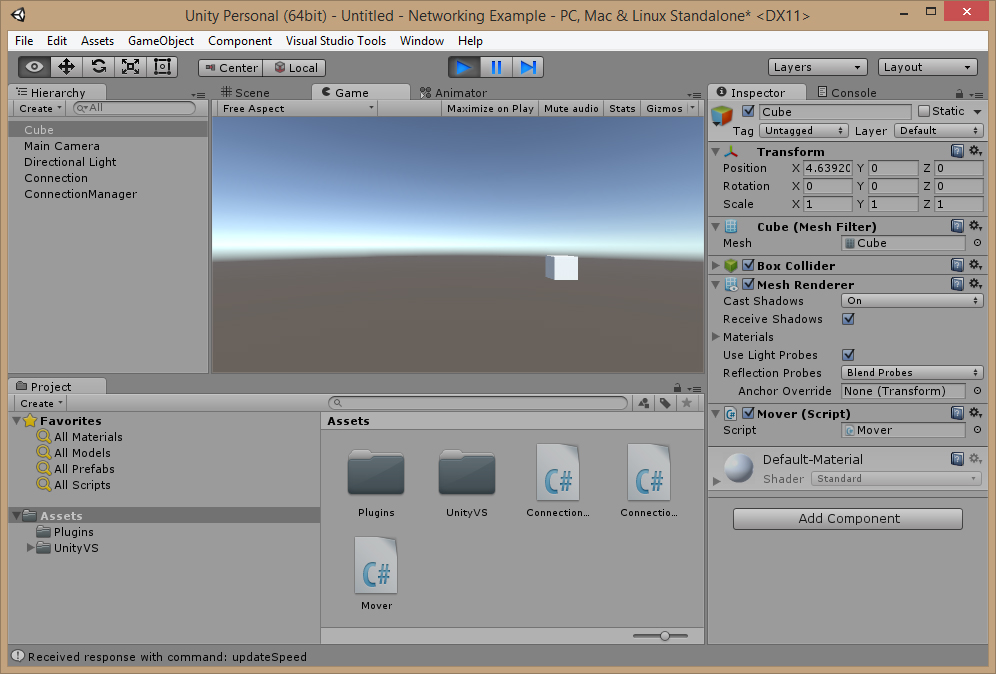
Running our project now should yield a succesfull log in! Hooray!! We can now send and receive commands, so let’s expand our project a bit to try it out. Create a C# script with the name Mover and write this code. Then add to Unity a 3D Object Cube (or anything else visible). Add as a component the Mover script. Now run the code. By pressing the W, Unity sends the forward command to server and the server responds with the speed. By pressing Space, Unity sends the halt command to the server, and the server makes the speed zero and returns it for Unity. The cube should move and then stop as you press the buttons.
 That’s it!
What to do next?
Although the example was very simple we can’t do much with this. However it is a base to go forward from here. Let me leave you with an excersise. Back in the Java project where we sent the command updateSpeed we only send it to one user. Can you change it to send it to all users connected in the zone?
Also when more players connect to the server you need to know which gameobject belongs to which player. That’s easy! When you send back commands from the server add as a parameter the player’s id, so the clients always know which players object should be moving.
The rest I leave to you (or not, I might create a part 2 with a more practical example, and depth to SmartFoxServer. What do you think? ) Hope you enjoyed it and if you have any questions don’t hesitate to ask.