Integrating Unity with React Native
Konstantinos Egkarchos / May 30, 2025
Unity is great at making interactive scenes, Augmented and Virtual Reality. But not great at making generic apps. If the interactive graphics is just a small part of the app then maybe Unity is an overkill. A simple app framework that doesn't require a lot of resources and can load Unity when needed would be great.
In this post I'm going to show you how to integrate Unity with React Native utilising Unity's build as Unity as a Library (UaaL) feature.
Install React Native
Assuming you have set up your environment for React Native per the official documentation, you can create a new React Native project using the following command:
npx @react-native-community/cli@latest init ReactUnityThis will create a new React Native project named ReactUnity with the latest version of the React Native CLI. At the time of writing, the latest version is 0.79.2.
In that project install the react-native-unity package:
npm install @azesmway/react-native-unityThe react-native-unity package can embed a Unity project into React Native. The package offers two-way communication between React Native and Unity, so we can send messages from React Native to Unity and vice versa.
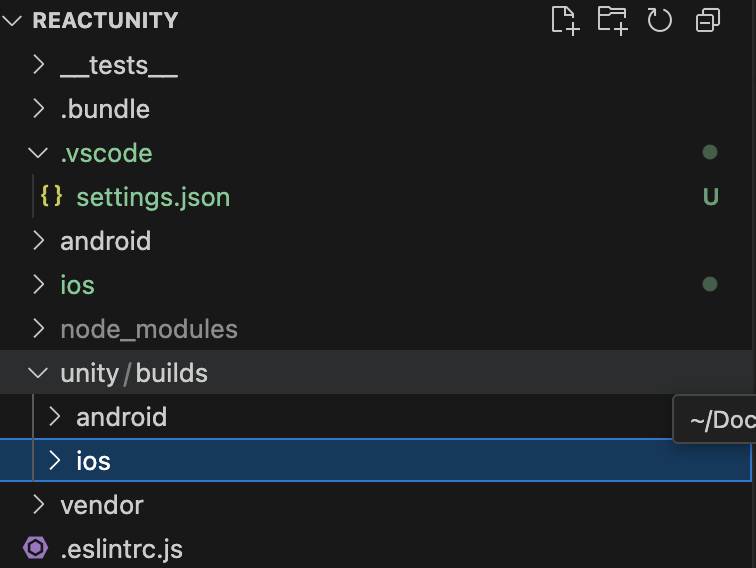
Before we continue with Unity we need to create a couple of folders inside the React Native project. In the root folder create the path unity/builds/ios and unity/builds/android. This is where the Unity project will be built for iOS and Android respectively.
Set up Unity
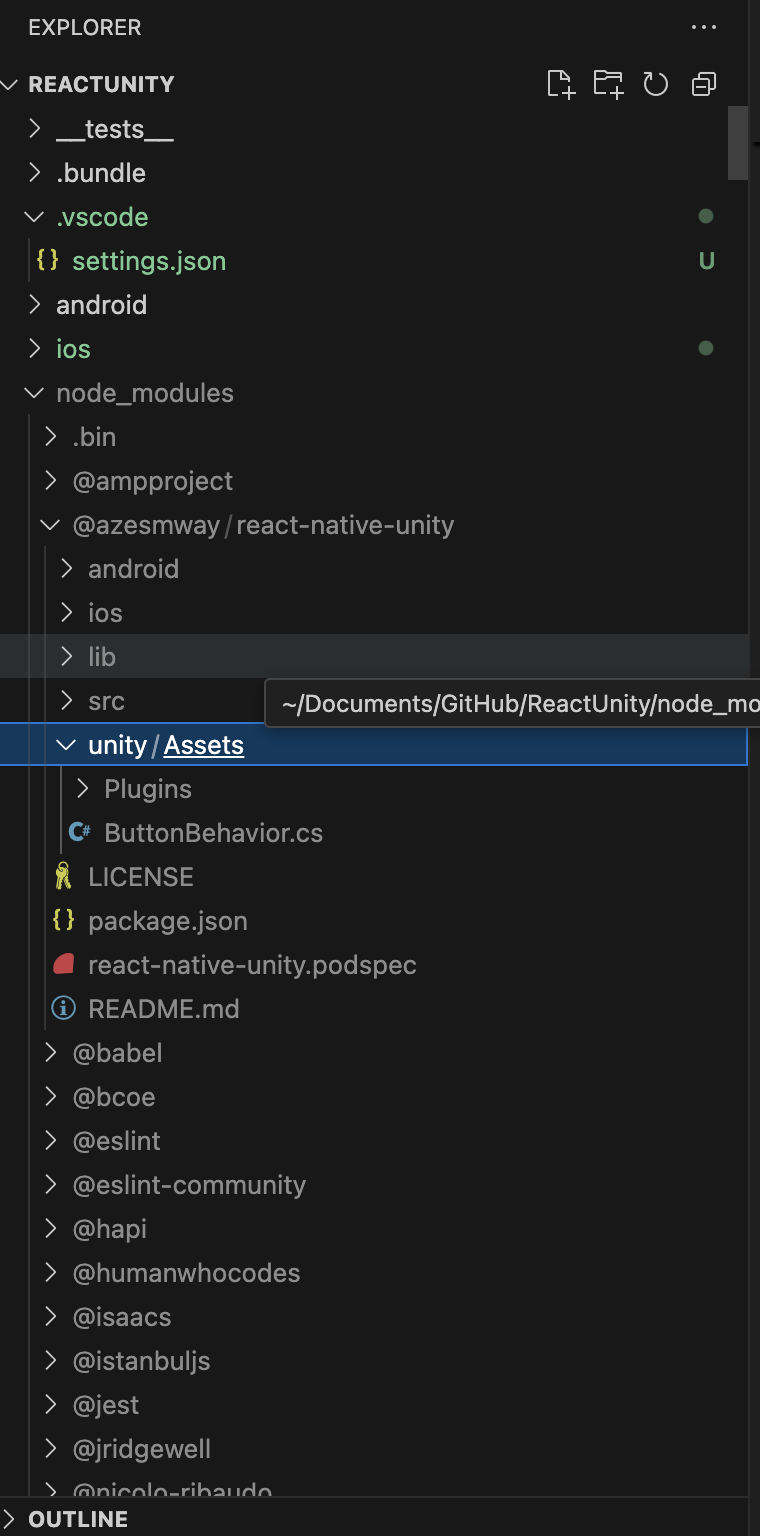
Inside the Unity project, a couple of plug in files are needed to make the integration work. In the node_modules folder of @azesmway/react-native-unity, there is a folder named unity/Assets. Copy the contents of that folder into your Unity project.
iOS setup
Build the project for iOS.
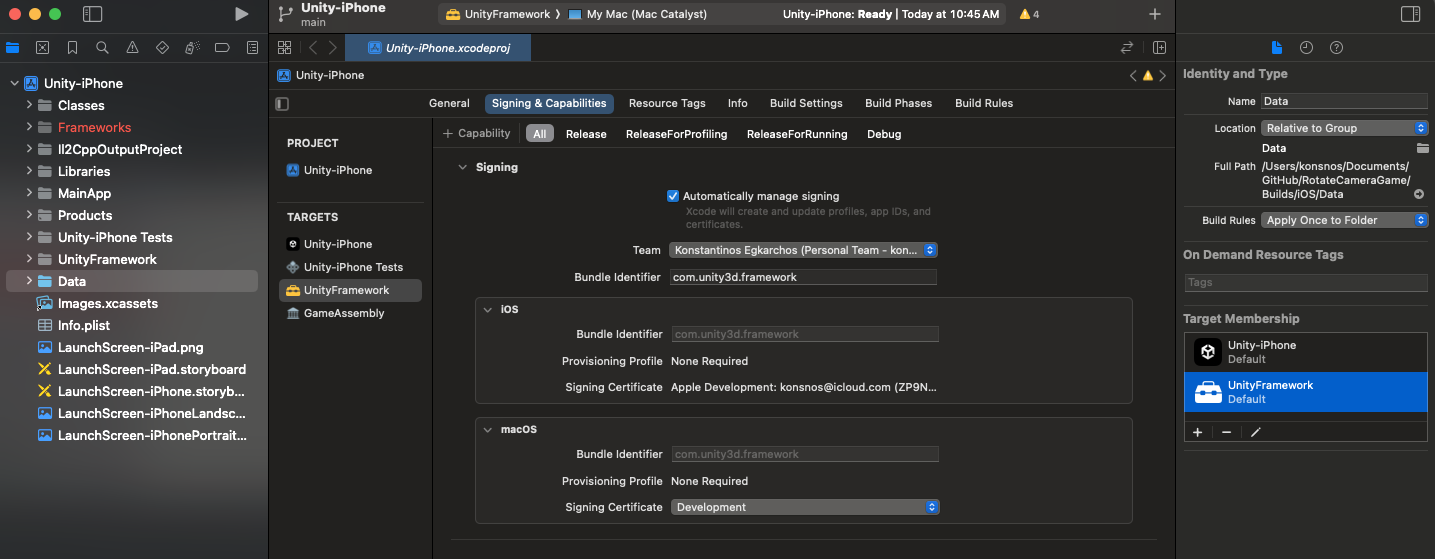
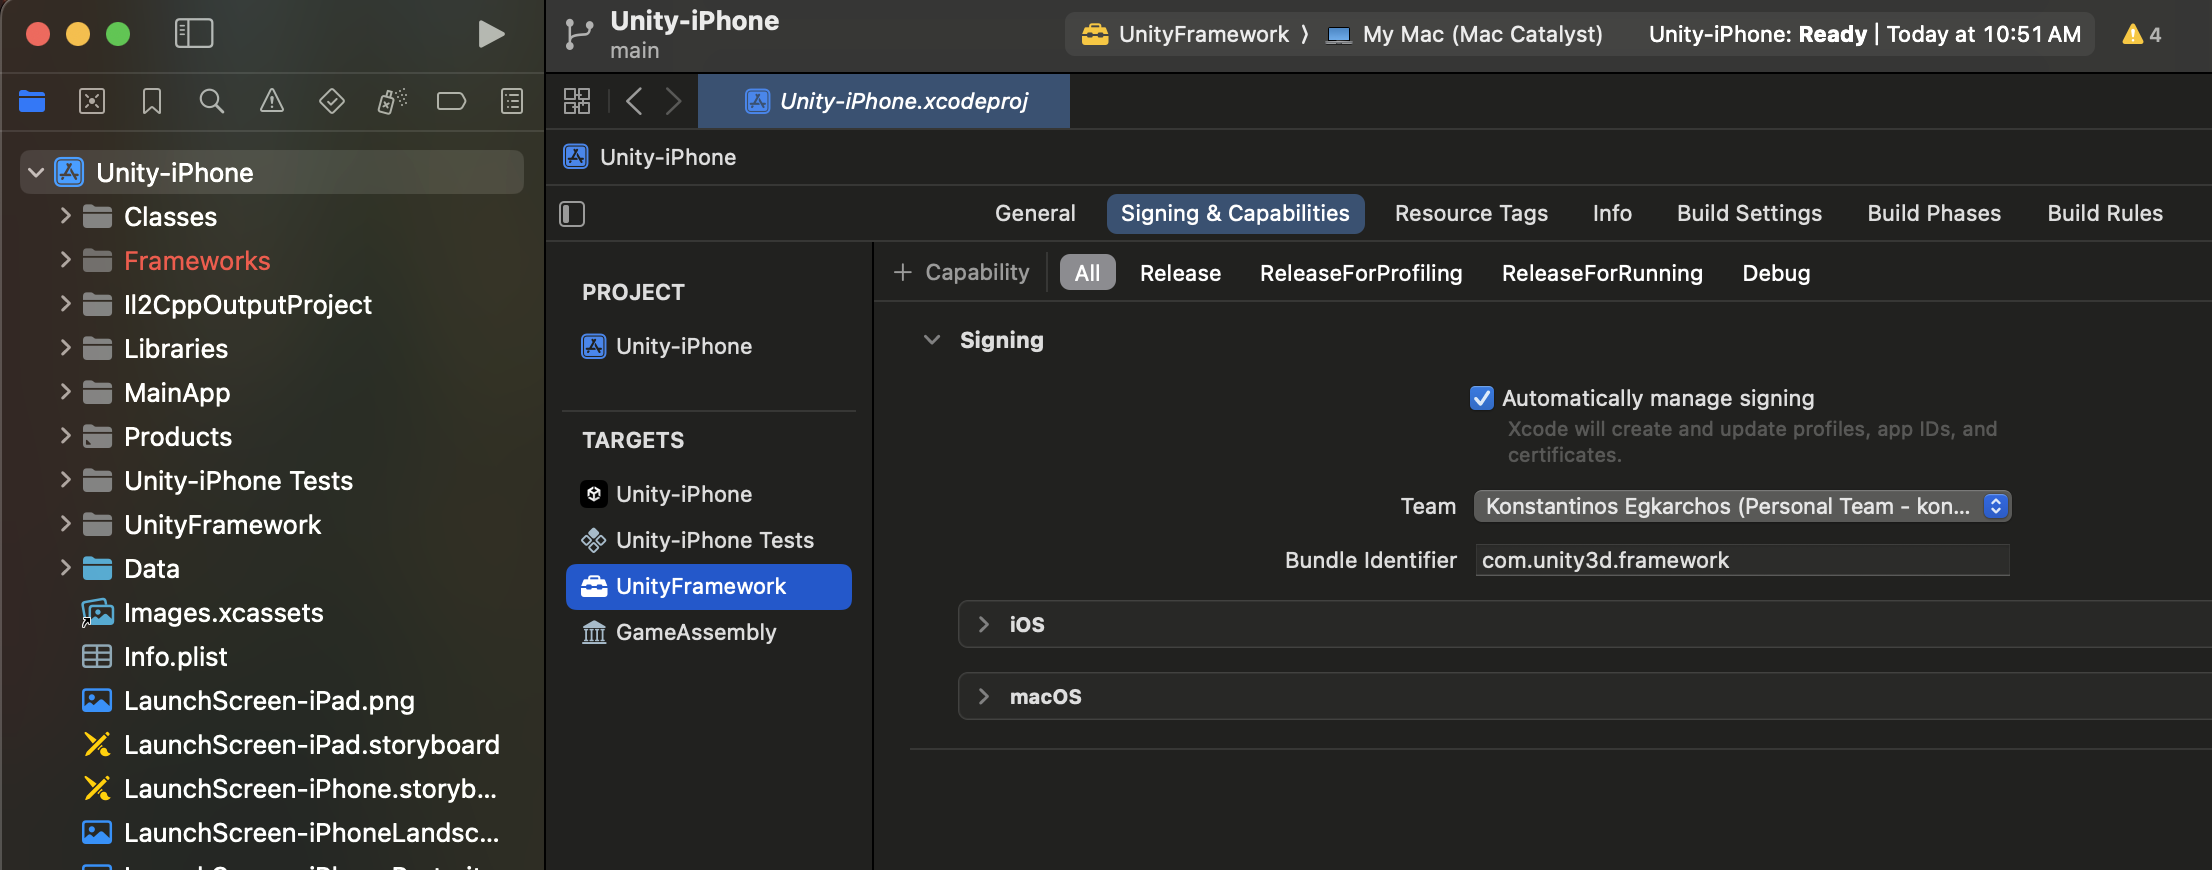
Open the XCode project. In order to embed Unity inside React Native we need to build the UnityFramework instead of the Unity-iPhone target. To do that, we need to pack the UnityFramework with the Data folder which contains your project's assets and .NET assemblies. With the Data folder selected, at the right panel, under the Target Membership add the UnityFramework target.
Next, find the NativeCallProxy.h file. At the right panel, under the Target Membership set the UnityFramework header visibility to public.
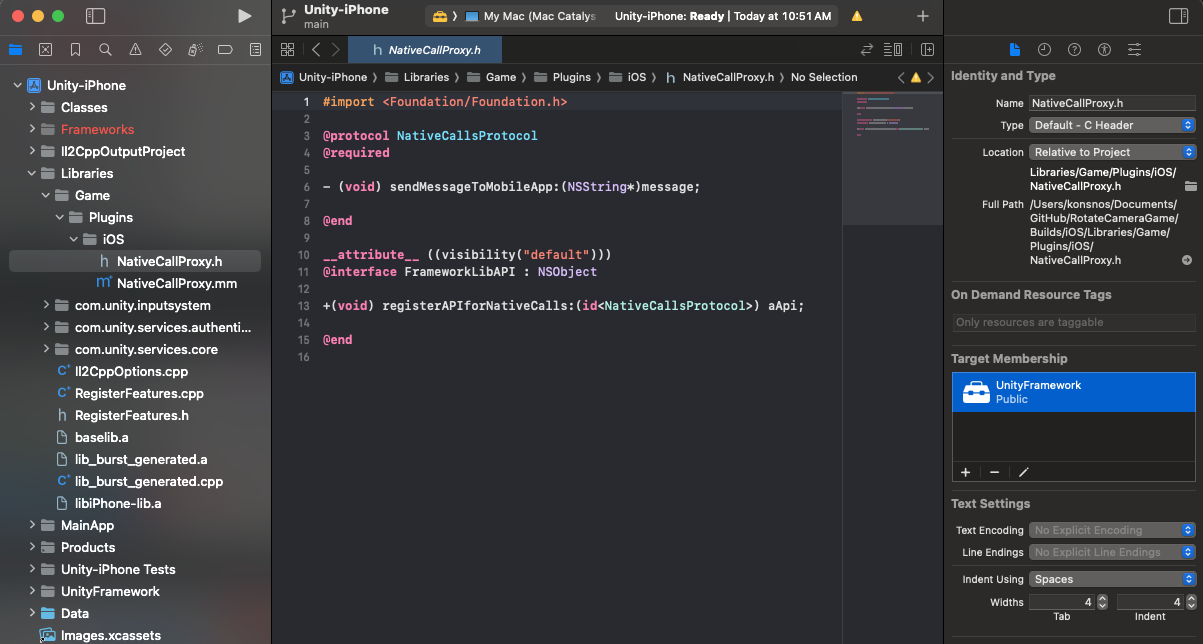
Sign the UnityFramework target with a development team. Finally, set the UnityFramework target at the top and build it.
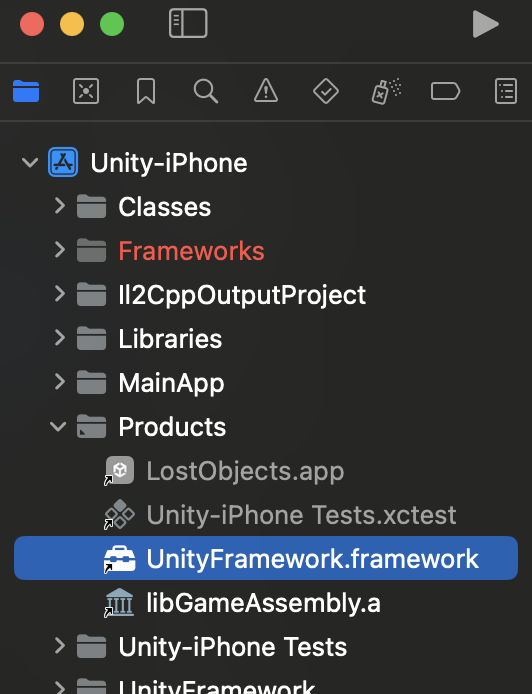
After a successful build, the built framework can be found inside the Products folder. Open it in Finder and copy the UnityFramework.framework inside the unity/builds/ios folder you created earlier in the React Native project.
Android setup
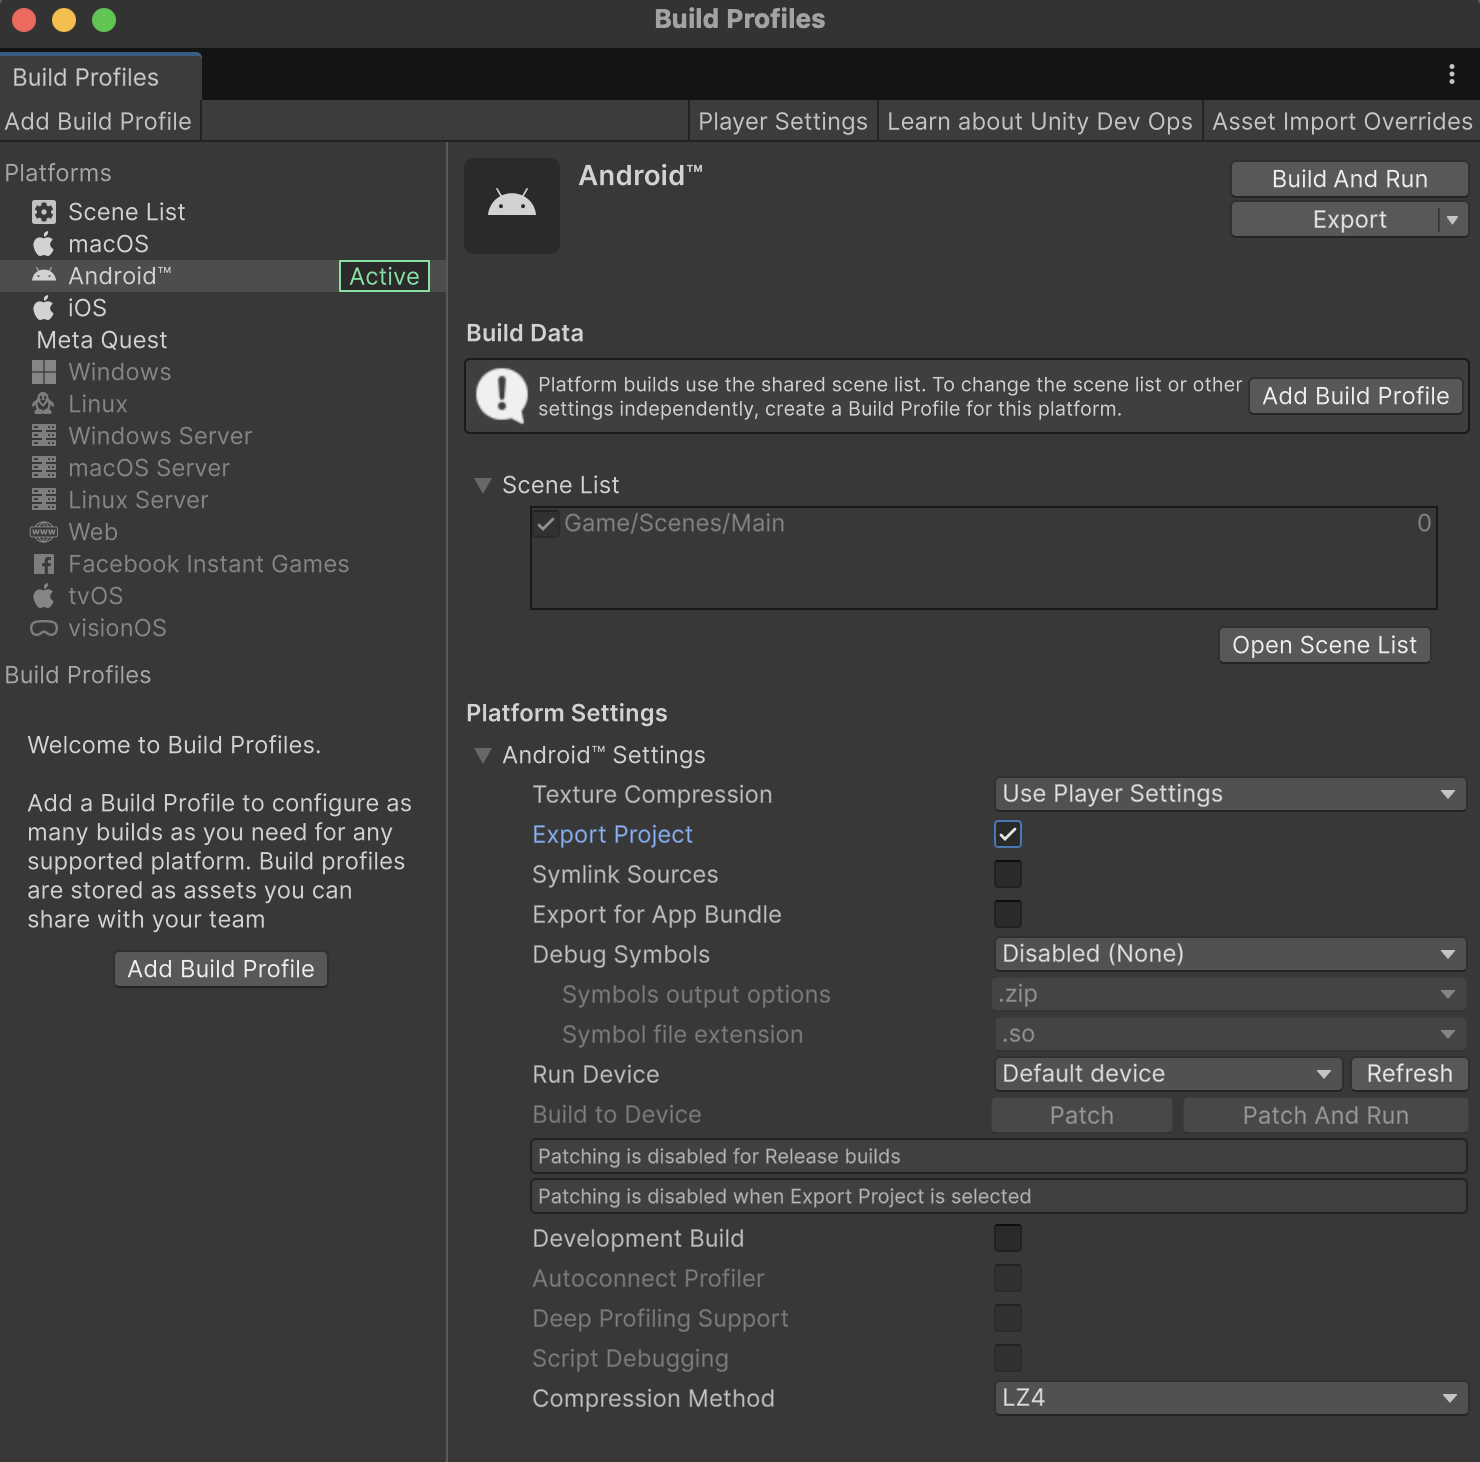
Export the project for Android into the unity/builds/android folder.
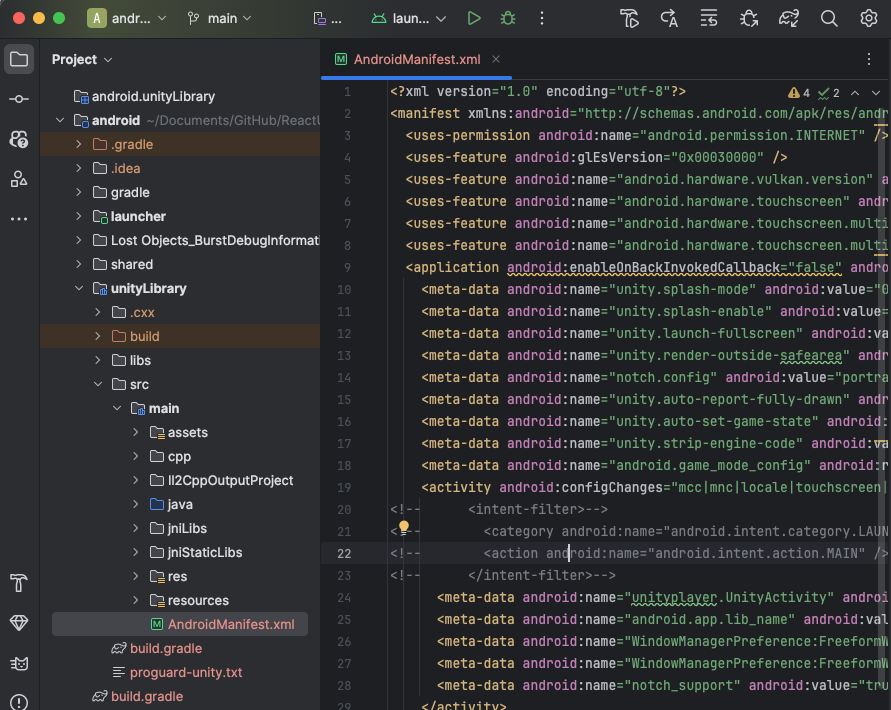
Open the exported project in Android Studio. Find the unityLibrary/src/main/AndroidManifest.xml and remove the <intent-filter> tag inside the <activity> tag. This is required as Unity will be embedded inside the React Native app, and we don't need the intent filter to launch Unity as a standalone app.
In the android directory of the React Native project, find the settings.gradle file and add the following lines to include the Unity library:
include ':unityLibrary'
project(':unityLibrary').projectDir=new File('..\\unity\\builds\\android\\unityLibrary')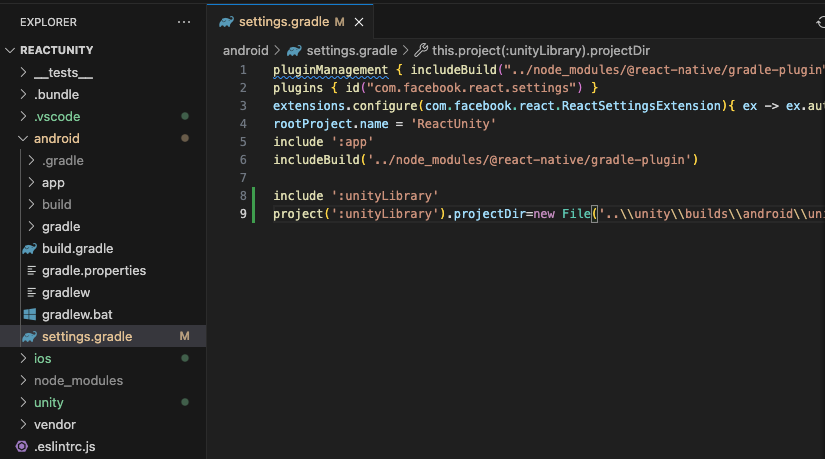 This will include the Unity library in the React Native project.
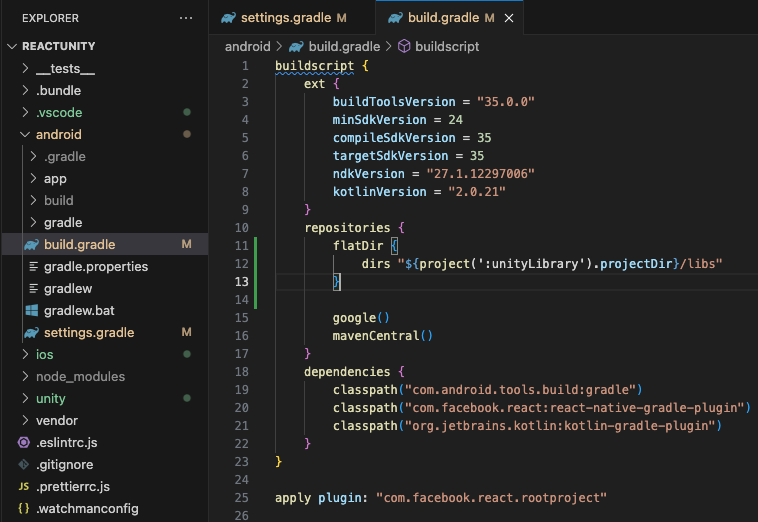
Next, open the build.gradle and add the following lines under repositories {:
flatDir {
            dirs "${project(':unityLibrary').projectDir}/libs"
        }
This will allow Gradle to find the Unity libraries.
Next, append the following lines to the gradle.properties file.
unityStreamingAssets=.unity3dThis will ensure that the Unity Streaming Assets are correctly handled by the React Native project.
Finally, modify the app/src/main/res/values/strings.xml and add the following line inside the <resources> tag:
<string name="game_view_content_description">Game view</string>This is required by Unity.
If you are using Unity 2023 or newer as I am, an additional change is required. Trying to build the project will result into the following error:
ReactUnity/node_modules/@azesmway/react-native-unity/android/src/main/java/com/azesmwayreactnativeunity/UPlayer.java:100: error: incompatible types: UnityPlayer cannot be converted to FrameLayout return unityPlayer; ^Edit the file node_modules/@azesmway/react-native-unity/android/src/main/java/com/azesmwayreactnativeunity/UPlayer.java at line 100 instead of returning unityPlayer to
throw new NoSuchMethodException("getFrameLayout method not found. Are you using Unity 2022 or older?");As the code exists inside the node_modules folder, this change will be lost if you update or reinstall the package.
Lastly, if the build process fails due to not finding the local.properties file, copy-paste the one from the unity/builds/android/unityLibrary folder into the android folder of the React Native project. This file contains the path to the Android SDK and is required for the build process.
Set up React Native
Back in React Native, we need to load the Unity view. We are going to use React Navigation to navigate between the React Native screens and the Unity view. Install the following packages for React Navigation:
npm install @react-navigation/native @react-navigation/stack react-native-gesture-handler react-native-safe-area-context react-native-screensApart from the navigation packages, the rest are dependencies for React Navigation to work properly.
Regenerate the pods for iOS to ensure that the Unity framework is linked correctly:
rm -rf ios/Pods && rm -f ios/Podfile.lock && npx pod-installIn React Native, we will create two screens: a Home screen with a button to open the Unity view, and the Unity view itself. Inside Unity
Edit the App.tsx file with the following code:
import React from 'react';
import { Button, View } from 'react-native';
import { NavigationContainer } from '@react-navigation/native';
import { createStackNavigator } from '@react-navigation/stack';
import Unity from './UnityScreen';

const Stack = createStackNavigator();

function HomeScreen({ navigation }: any) {
  return (
    <View style={{ flex: 1, justifyContent: 'center', alignItems: 'center' }}>
      <Button
        title="Open Unity"
        onPress={()=> navigation.navigate('Unity')}
      />
    </View>
  );
}

function App(): React.JSX.Element {
  return (
    <NavigationContainer>
      <Stack.Navigator>
        <Stack.Screen name="Home" component={HomeScreen} />
        <Stack.Screen name="Unity" component={Unity} />
      </Stack.Navigator>
    </NavigationContainer>
  );
}

export default App;
Next, create a new file named UnityScreen.tsx in the root of the React Native project with the following code:
// @ts-ignore
import UnityView from '@azesmway/react-native-unity';
import React, {useEffect, useRef} from 'react';
import {View} from 'react-native';

interface IMessage {
  gameObject: string;
  methodName: string;
  message: string;
}

const Unity = ({navigation}: {navigation: any}) => {
  const unityRef = useRef<UnityView>(null);

  const message: IMessage = {
    gameObject: 'ReactNativeBridge',
    methodName: 'Hello',
    message: 'Hello from React Native!',
  };

  const logMessage = () => {
    console.log(
      'unityRef.current.postMessage ===> ',
      message.gameObject,
      '>',
      message.methodName,
      '>',
      message.message,
    );
  };

  const onUnityMessage = (result: any) => {
    const message = result.nativeEvent.message;
    console.log('onUnityMessage ===> ', message);
    if(message === 'back') {
      navigation.goBack();
    }
  };

  useEffect(() => {
    setTimeout(() => {
      if (unityRef && unityRef.current) {
        logMessage();
        // @ts-ignore
        unityRef.current.postMessage(
          message.gameObject,
          message.methodName,
          message.message,
        );
      }
    }, 2000);
  }, []);

  return (
    // If you wrap your UnityView inside a parent, please take care to set dimensions to it (with `flex:1` for example).
    // See the `Know issues` part in the README.
    <View style={{flex: 1}}>
      <UnityView
        // @ts-ignore
        ref={unityRef}
        style={{flex: 1}}
        onUnityMessage={(result: any)=> onUnityMessage(result)}
      />
    </View>
  );
};

export default Unity;
Time to test!
npm startThis will start the React Native development server. You can run the app on an iOS or Android simulator or device. For iOS, you can run the following command:
npx react-native run-iosFor Android, you can run the following command:
npx react-native run-androidThe app should show a Home screen with a button to open the Unity view. When you press the button, it will navigate to the Unity view and send a message to Unity.
Unity - React Native communication
Back to the Unity project, we had a script ButtonBehavior.cs. This is a basic script that sends messages from Unity to React Native.
We are going to modify it to both send and receive messages from React Native. Rename the script to ReactNativeBridge.cs and replace its content with the following code:
using System.Runtime.InteropServices;
using UnityEngine;

public class NativeAPI
{
#if UNITY_IOS && !UNITY_EDITOR
    [DllImport("__Internal")]
    public static extern void sendMessageToMobileApp(string message);
#endif
}

public class ReactNativeBridge : MonoBehaviour
{
    public void SendBack()
    {
        switch (Application.platform)
        {
            case RuntimePlatform.Android:
            {
                using (var androidJavaClass =
                       new AndroidJavaClass("com.azesmwayreactnativeunity.ReactNativeUnityViewManager"))
                {
                    androidJavaClass.CallStatic("sendMessageToMobileApp", "back");
                }

                break;
            }
            case RuntimePlatform.IPhonePlayer:
#if UNITY_IOS && !UNITY_EDITOR
            NativeAPI.sendMessageToMobileApp("back");
#endif
                break;
        }
    }

    public void Hello(string message)
    {
        Debug.Log("Received message: " + message);
    }
}
Create a new GameObject in the Unity scene and attach the ReactNativeBridge script to it. The name of the GameObject should be ReactNativeBridge so that it matches the gameObject property in the message we send from React Native in the UnityScreen.tsx file.
Additionally, create a Button in the Unity scene and attach the SendBack method to its OnClick event. This will allow us to send a message back to React Native when the button is pressed.
Run the project again, and you should see the Home screen with a button to open the Unity view. Inside Unity when clicking the button you created to call the SendBack method, it will send a message back to React Native and navigate back to the Home screen.
Final words
This is a basic integration of Unity with React Native. You can extend the functionality by adding more methods to the ReactNativeBridge script and sending messages from React Native to Unity. My approach is to send JSON messages from React Native to Unity and parse them. This way, you can send complex data structures between the two platforms.
As far as performance is concerned, keep in mind that it will take more resources than a regular Unity app, due to the overhead of React Native. However, if you only need Unity for a small part of your app, this approach is quite efficient.